一、前言
| 软件/环境 | 说明 |
|---|
| 操作系统 | Windows 10 |
| SDK | 2.1.401 |
| ASP.NET Core | 2.1.3 |
| IDE | Visual Studio Code 1.27 |
| 浏览器 | Chrome 69 |
你可能需要的前置知识
https://ken.io/serie/dotnet-core-quickstart
http://www.runoob.com/csharp/csharp-tutorial.html
下载地址:https://www.microsoft.com/net/download
跨平台,根据自己的需求选择即可。
这里我下载的是:SDK 2.1.401,你可以选择2.1.x的最新版本
略,一直下一步即可,没什么需要特别注意的。
如果你真想了解,可以参考:https://ken.io/note/dotnet-core-qucikstart-helloworld-windows
下载地址:https://code.visualstudio.com/download
反正VS Code跨平台,根据自己的需要选择就可以了,
略,一直下一步即可,没什么特别注意的。
如果你用的macOS,直接拖动到应用程序目录即可,更简单快捷。
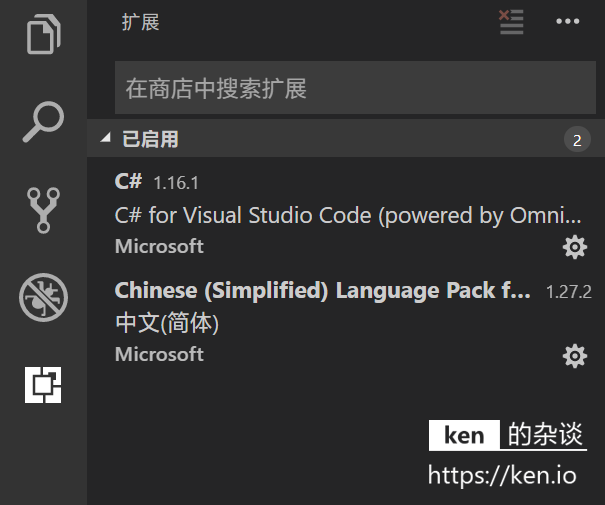
快捷键(Ctrl+Shift+X)进入扩展管理页,直接搜索扩展名安装即可,或者点击左侧工具栏图标进入扩展管理页
macOS版本快捷键是 Shift+Commnad+X

#创建项目目录
mkdir projects#进入项目目录cd projects#创建项目
dotnet new web -n helloweb
菜单:文件->打开,选择项目目录打开项目
项目打开后,VS Code会检测到缺少两个必须的Package:OmniSharp、.NET Core Debugger
并且会自动帮你安装
Downloading package 'OmniSharp for Windows (.NET 4.6 / x64)' (31017 KB).................... Done!
Installing package 'OmniSharp for Windows (.NET 4.6 / x64)'

Downloading package '.NET Core Debugger (Windows / x64)' (41984 KB).................... Done!
Installing package '.NET Core Debugger (Windows / x64)'

Finished
安装完成后VS Code会提示:
Required assets to build and debug are missing from ‘helloweb’. Add them?

选择Yes即可。
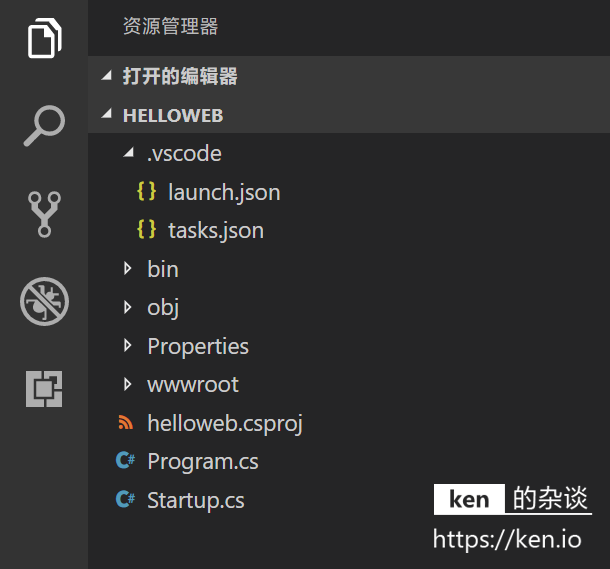
这时候,可以看一下左侧资源管理器,我们可以看到.vscode目录添加了两个配置文件:launch.json,tasks.json。
项目的编译和调试配置文件就已经准备好了

我们直接按下F5,或者菜单:调试->启动调试启动项目
ASP.NET Core 默认绑定是5001端口,而且ASP.NET Core 2.1之后默认绑定了HTTPS,项目启动成功后,VS Code会帮我们打开默认浏览器并访问:https://localhost:5001
因为我们并没有配置SSL证书,所以浏览器会发出警告⚠️,以Chrome为例:

这时候,我们点击高级,救护出现继续访问的入口

我们点击继续访问,就会出现Hello World!

接着我们可以修改配置去掉HTTPS协议绑定
打开Properties/launchSettings.json文件
{  "iisSettings": {    "windowsAuthentication": false,
    "anonymousAuthentication": true,
    "iisExpress": {      "applicationUrl": "http://localhost:53122",      "sslPort": 44309
    }
  },  "profiles": {    "IIS Express": {      "commandName": "IISExpress",      "launchBrowser": true,      "environmentVariables": {        "ASPNETCORE_ENVIRONMENT": "Development"
      }
    },    "helloweb": {      "commandName": "Project",      "launchBrowser": true,      "applicationUrl": "https://localhost:5001;http://localhost:5000",      "environmentVariables": {        "ASPNETCORE_ENVIRONMENT": "Development"
      }
    }
  }
}
iisSettings、profiles.helloweb配置节点都有启动绑定配置,因为VS Code启动项目默认是不通过IIS来host的,iisSettings选项我们忽略即可。
 "helloweb": {      "commandName": "Project",      "launchBrowser": true,      "applicationUrl": "http://localhost:5001",      "environmentVariables": {        "ASPNETCORE_ENVIRONMENT": "Development"
      }
}将applicationUrl修改为http://localhost:5001
然后重启项目(Ctrl+Shift+F5)机会看到干净纯洁的Hello World!

public class Program
{    public static void Main(string[] args)
    {
        CreateWebHostBuilder(args).Build().Run();
    }    public static IWebHostBuilder CreateWebHostBuilder(string[] args) =>
        WebHost.CreateDefaultBuilder(args)
            .UseStartup<Startup>();
}在应用启动的时候,会执行CreateWebHostBuilder方法,在这个方法中通过类Startup创建了默认了HostBuilder
public class Startup
{

    ConfigureServices(IServiceCollection services)
    {
    }    public void Configure(IApplicationBuilder app, IHostingEnvironment env)
    {        if (env.IsDevelopment())
        {
            app.UseDeveloperExceptionPage();
        }

        app.Run(async (context) =>
        {            await context.Response.WriteAsync("Hello World!");
        });
    }
}| 方法 | 说明 |
|---|
| ConfigureServices | 用于配置应用启动时加载的Service |
| Configure | 用于配置HTTP请求管道 |
web项目模板默认在项目启动的时候调用IApplicationBuilder.run方法,在当前HTTP上下文(HttpContext)中输出了Hello World!
context.Response.WriteAsync(“Hello World!”);
| 根目录/文件 | 说明 |
|---|
| .vscode目录 | VS Code项目配置目录,相当于.vs、.idea文件夹 |
| bin目录 | 编译输出目录,相当于Java项目的target目录 |
| obj目录 | 编译配置与中间目录,用于存放编译配置与编译中间结果 |
| Properties目录 | 用于存放项目配置 |
| wwwroot目录 | 静态文件目录 |
| helloweb.csproj文件 | 项目描述文件 |
| Program.cs文件 | 应用程序入口类文件 |
| Startup.cs文件 | ASP.NET Core Web应用启动类文件,用于项目启动前进行相关配置 |
https://github.com/ken-io/asp.net-core-tutorial/tree/master/chapter-01
本文首发于我的独立博客:https://ken.io/note/asp.net-core-tutorial-web-helloworld